
Kashiwazaki Sena

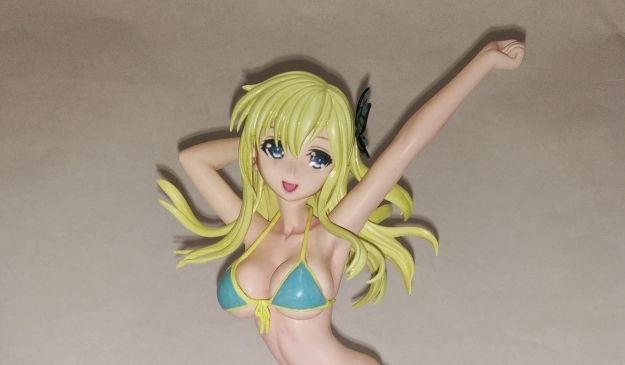
My first garage kit is Sena from Haganai.

Senjyogahara Hitagi

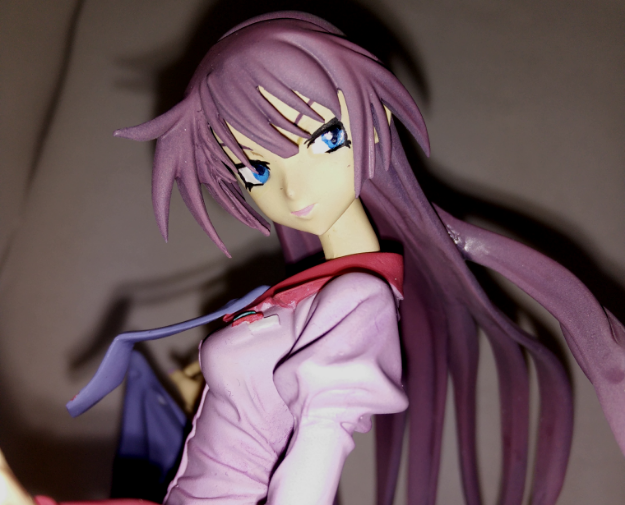
My second GK is finished, Senjougahara from Bakemonogatari.

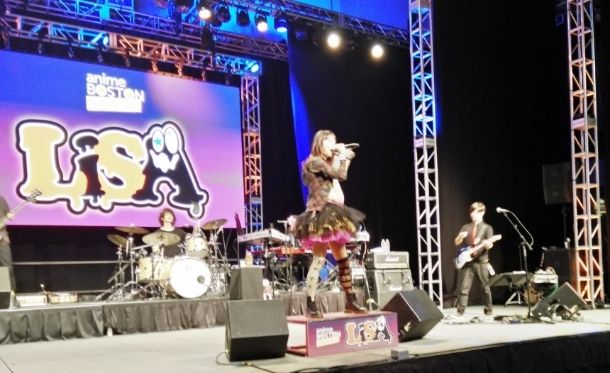
Anime Boston 2015 LiSA Concert Awesomeness!!

One of the greatest nights, so much fun.

Vice Commander Asuna

My third and most difficut GK, my favorite, Asuna.

Home Made LiSA Statue

My first sculpted in clay and cast in resin statue.

Platinum #57: Kingdoms of Amalur: Reckoninge

Fun RPG from the last generation.

Showing posts with label GK. Show all posts

Wednesday, May 20, 2015

Kuroyukihime Death by Embracing Garage Kit Completed

Project Page: e2046
My Gallery

This was a fun build, especially coming off off the previous Asuna kit. I had to put off working on my LiSA statue because I wanted to get this done by the end of the month, and it turned out to be my quickest build. At first it looked daunting because the kit consisted of about 60 pieces, but the simple color scheme made it easy and enjoyable. Painting mistakes were very forgiving being it was mostly robot parts and they are heavily shaded to look like light. I think it turned out really well, very similar to the official version.


This was my first time with a kit with clear pieces. Having no transparent paint, I mixed food coloring to Future to make the orange pieces on the bottom. It worked fairly well, comes out a bit too light and took about 3 coats. The purple pieces where a fiasco to themselves. Turns out it is really hard to mix the correct, bright purple paint I needed. I had to purchase a fluorescent violet color by Createx, not transparent because it was unavailable on Amazon, Createx are usually thinned ok, but this one is thick! I have a feeling it is old because of the layer of dust that came on it. But after thinning and mixing I got the right balance and the pieces kind of look transparent. However, once finished, getting the clear base on and glued was quite the nightmare.


All my previous attempts at shading skin were done the same way. I sealed with Future, than applied the pastel shading. The problem was the pastel never stuck well enough, and the shading was barely visible. This time I decided to use a different technique: to paint a dark color where I wanted shading first, then apply the skin color over it. I found that I had much more control over the final color using this method. As a last minute thought, I wanted to add color to the face (i.e. blush on the cheeks) so I did the pastel shading BEFORE applying a Future coat and it worked way better, though any pastel you applied was pretty much there permanently, so be very careful.


The shading of the orange on the black, to make it look like light was coming from the base, was easy to do. I hope it accomplishes that effect, but to add oomph, I added LEDs inside the base, powered by batteries or DC input. This was my first time working with electronics and soldering, so I went the easy route and used an LED strip. The only downside was not being able to get orange in the small size led 3528, so red will have to do. I also found out I have no idea what I am doing when it comes to soldering. I watch maybe 2 videos on YouTube, and those guys made it look easy. I got it done, but the solder joints are an ugly mess. Maybe it just takes practice.


The sealer I have been using was Future floor polish, and to get a matte finish, another coat of Future mixed with Tamiya flat base. But as I found out during my previous Asuna kit, getting the right mix of the two can be a difficult task; to much flat base and it has a milky effect, not enough and it is still glossy. I decided to try Galeria Matte Varnish recommended on several blogs and forums. I coated a few pieces as a test, and it did nothing. After a few minutes of research, I realized it need to be shaken before use. A thin coat will be rid of most gloss, a thicker coat rids nearly all, with minimal to no effect on the color. Until I glued the pieces the next day, and they developed a white firlm only near where super glue was used. With a careful touch, it seem most can be buffed off, though not in small crevases that are out of reach.

Wednesday, April 22, 2015

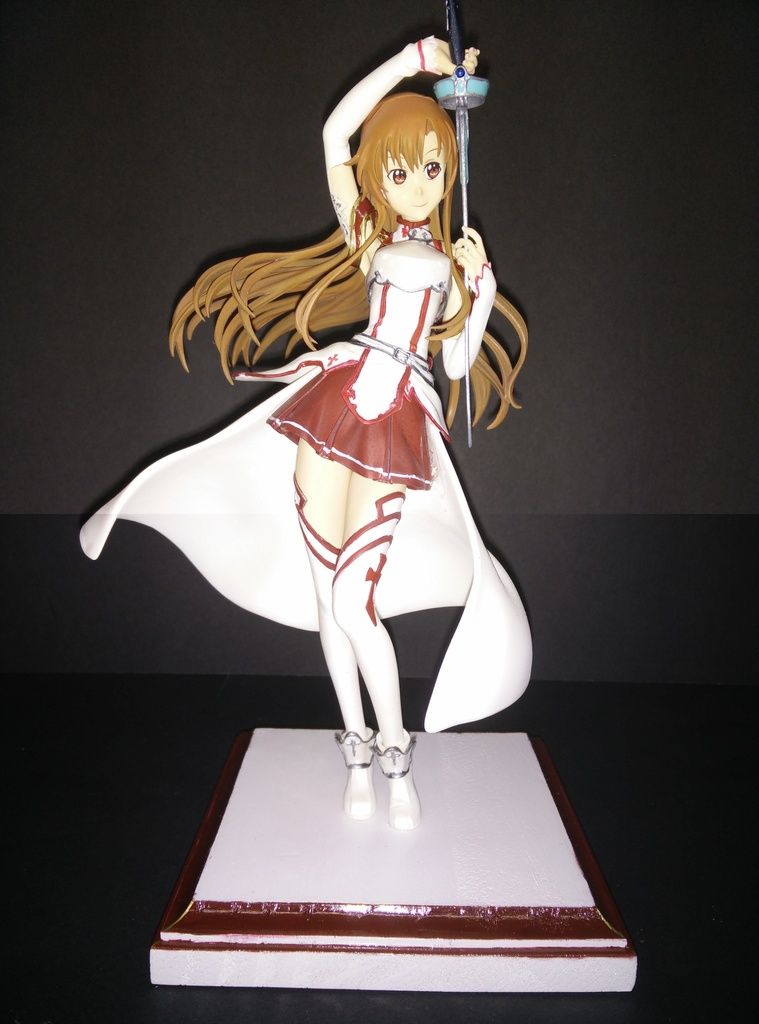
Asuna KOB Outfit Garage Kit COMPLETED

Product Page: e2046
My Gallery


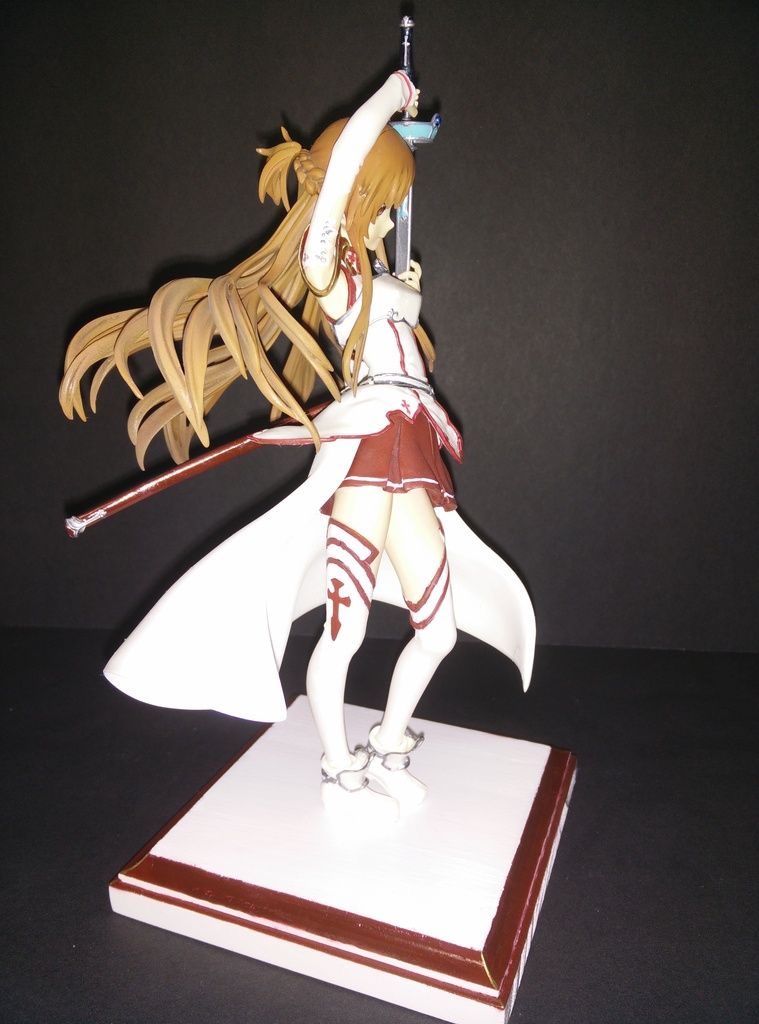
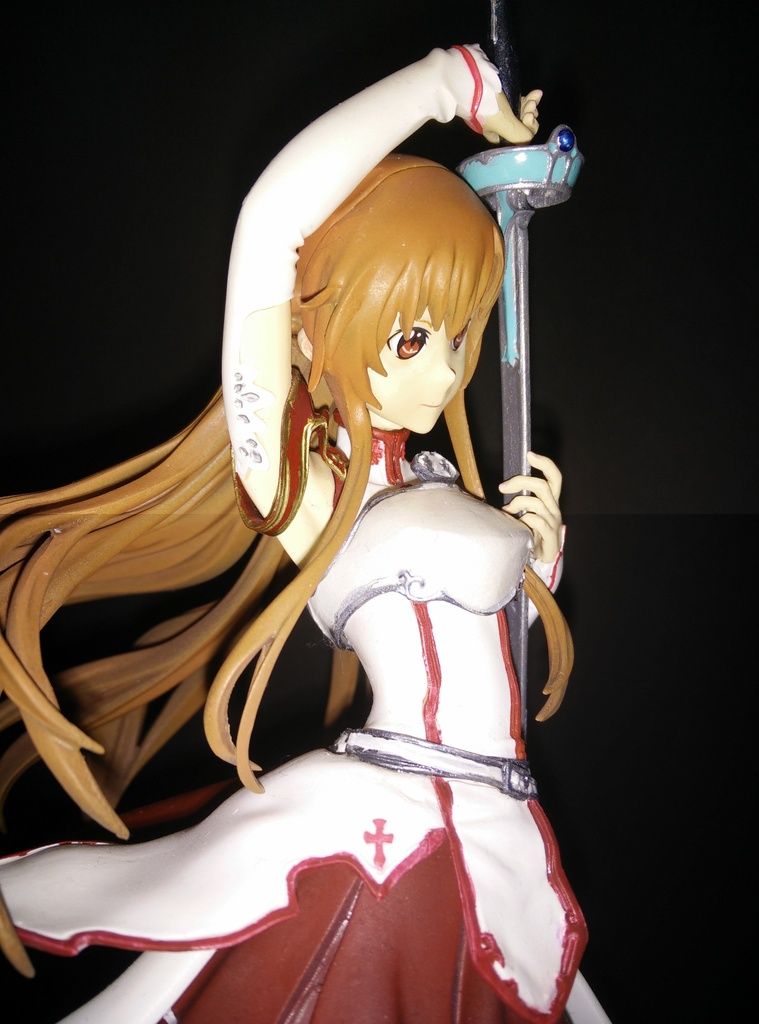
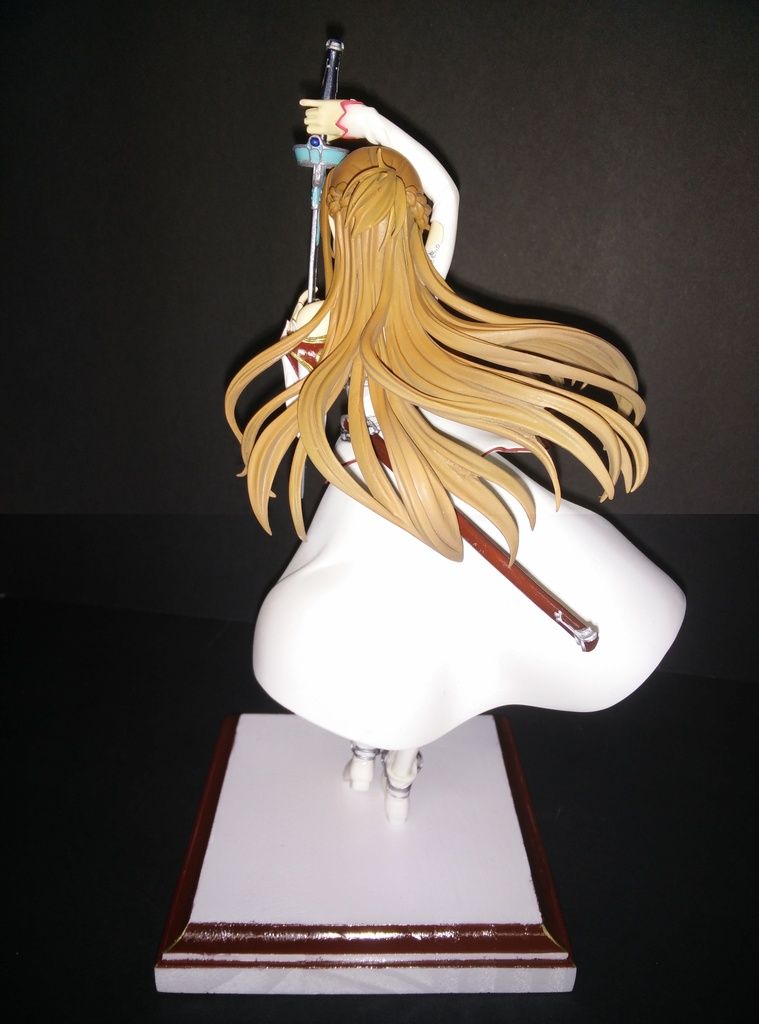
My third and latest garage kit (GK) is Asuna from Sword Art Online in her equipment from the guild Knights of the Blood in Aincrad. I love Asuna but this GK was a royal pain.


First off, white is the most unforgiving color. It takes many coats of paint to feel really white. I am a messy painter so it is really hard to keep it pristinely white. Cross contamination from my hands was a big issue. Also, many dust specs and fibers are noticeable in the dried paint. I have not figured out how to avoid dust sticking to paint to some degree but it usually isn't noticeable on other colors. I do not want to work with white clothing in the future, aside from the already purchased Saber (will be shown at a later date.)

Besides there being 60+ pieces (too many), many being really small, Asuna has many dark colors like silver and red as highlights to the white uniform. Painting freehand has been a real challenge, and as a newbie to get straight lines is almost impossible. I bought paint pens to try to help, but that only worked for larger areas. Any mistake is blatantly noticeable and really hard to cover up with white.


The paint pens I bought are Extra Fine Sharpie Oil-Based Paint Pens. The pens worked really well for small and quick touch ups, but not as well as for what I hoped, which was painting precise and small areas. The were small crevices that even the pens couldn't reach. The tip is more like a pen than a marker tip. Think felt tip, but the tip is hard plastic. Using the pens for extended periods means you have to push the tip down, into the body of the pen to get more paint. But not too hard/long or paint will spill out and make a mess.

This was my first kit that didn't come with a base. Thanks to a cheap dremel, pinning the figure to the base was not a problem. Paining it however was. This is the first base I made using wood so there were some difficulties possibly because it was wood and not resin but also because it was cheap wood. A while back I purchased about 6 wood bases of different shapes and sizes from an online craft store called Sunshine Discount Crafts.


The first problem was priming to wood. It seemed to soak up paint like a sponge, so the airbrush and usual priming paint was making little progress. Thanks to amazon, 2 days later I had a $3.89 can of Rust Oleum 280715 American Accents Ultra Cover 2X White Primer Spray Paint, which actually worked really well. I assume that all wood will react the same to the airbrush vs spray paint, but a real drawback of buying cheap wood was how hard it was to cover up the defects of the wood. Sanding made little difference; next time it might be a good idea to putty and sand the wood before painting, but at that point, it is better to just buy more expensive bases that might not need that treatment. I have one so I am curious to try it on a future model.

Liquitex Soft Body is the white paint I bought for the last kit, after the Badger Spectra-Tex ran out. I was happy with the set of Badger paints, minus the white. It was the only color that was super goopey and collected to the bottom. Shaking didn't work and needed manual stirring. It was a pain so back to amazon to find a new white. I settled on Liquitex knowing I had to thin it for an airbrush, I admit to not doing enough research. I only ever used it mixing with other paints until this model. Mixed it is okay, but straight white is not good for airbrush mainly because it is so hard to clean from the airbrush. It also sprays real slow, possibly because I use a .2mm nozzle or a low psi, neither of which I felt like switching because I like the way it is set right now.


This was my first time using Bob Smith 151 Insta-Set 2oz Accelerator for fast drying superglue. I saw Adam Savage using it in a Tested.com YouTube video building a replica rifle from a movie. I've used the baking soda trick, but this stuff is awesome. Almost instant drying when joining 2 pieces, one with glue on it, the other with accelerator. The only downside is it makes it even easier to glue your fingers to things. I lost some skin the this stuff on more than one occasion. I think if it came with a brush along with the spray cap it would be easier to use.

The one thing I feel I really nailed on this figure was the hair color. Asuna's hair, in the books, is described as chestnut brown. I don't really know what this means, because in real life, chestnuts are really dark, but in the anime, her hair is a dark orange. The first pass of her hair was a very vibrant orange, and it might have stayed that way but when sealing with a future/tamiya flat coat, there was too much tamiya and it left a white discoloration forcing me to repaint. Luckily I did, because the next coat was dark and used a lot of brown nailing her look.

Overall, I am disappointed with this build, not because it looks bad, but because I know I could do better. From, assembly in the wrong order, to repainting, to glue drips, to sloppy paint lines, I wish I had done a better job with my favorite character. On the upside, I have another Asuna kit, only about 20 pieces, to tackle and improve on in the future.

Friday, March 13, 2015

Senjyogahara Hitagi Garage Kit COMPLETED

Product Page: e2046
My Gallery

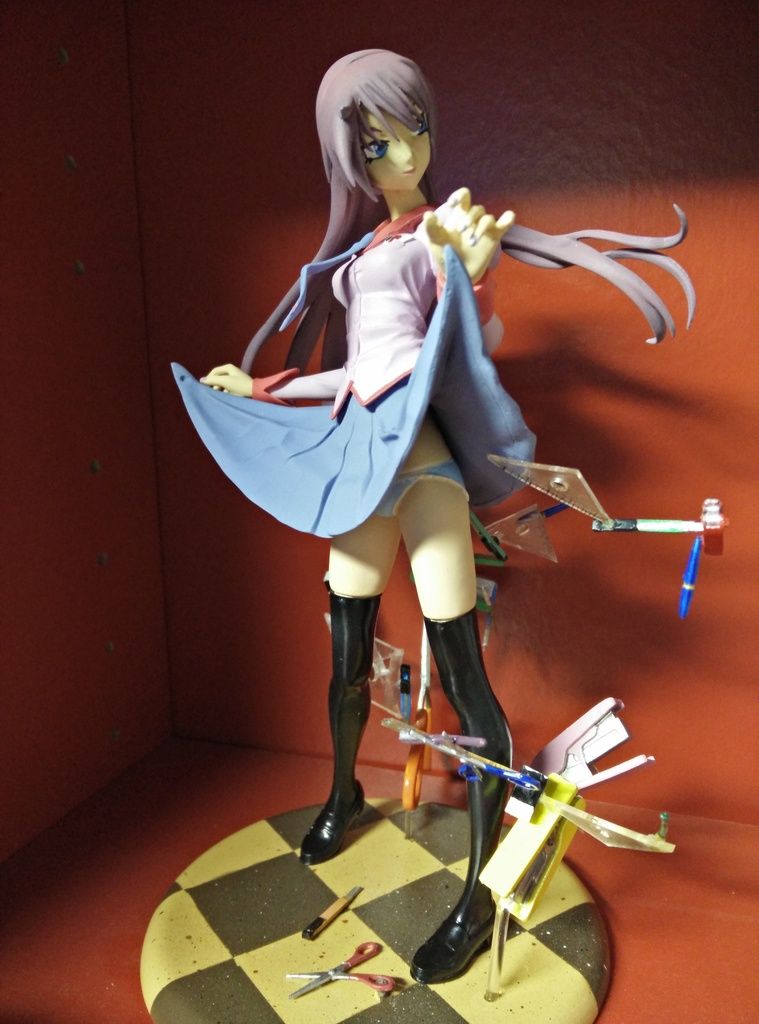
My second GK(garage kit) build is Senjougahara from Bakemonogatari. She was the first character to introduce the concept of tsundere to me. I am super happy with it. I think the colors are spot on, they're even better in person. This kit has over 50 pieces, a huge jump over my first model. I am especially proud of how the floor turned out, totally worth doing it twice. The kit actually came with a different configuration, so the torso and hands come off with magnets to give it interchangeable skirts. (Pics of that in the gallery above.)


All the little pieces of stationary were a complete nightmare, but they're what make it so special. This pre-painted PVC figure is so expensive it kept me from this model for so long. Future floor polish worked great to make the transparent pieces virtually clear. The same shading for the hair and body was used as the first one, dark/light coats and pastels respectively.

**note: I know the difference in spelling of her name on this page. The title indicates the way it was posted on the product page, I recognize the second spelling in the body as correct.

Kashiwazaki Sena Garage Kit COMPLETED

Product Page: e2046
My gallery

This was my first garage kit build. Overall I am very happy with this kit. The was virtually nothing wrong with the kit when it arrived such as broken pieces or bubbles in the resin. A common complaint of e2046 is the over sanding of seam lines, but those complain might be old or too picky because there was a bit, but it wasn't a big deal.


I believe this is my first 1/7 scale figure because it is by far the biggest figure on my shelf. I am very happy with the colors, though I wish the top coat had less gloss. The body is shaded with pastels, but it is hardly noticeable. The hair is shaded with dark and light airbrushed acrylic paint. The base has a layer of 60 grit sandpaper and painted to look like she is at the beach. Recently I added shells to the bottom to further the beach look.

Tuesday, February 3, 2015

Hitachi 115005 Rotary Tool Accessory Kit, 200-Piece

I purchased this kit for some sanding bits for the cheap rotary tool I bought. Has more than enough for some mild use making garage kit models. Does not include cutting or drilling bits but I have small drill bits from an old hand drill.

Product Page : Hitachi 115005 Rotary Tool Accessory Kit, 200-Piece

SE - Rotary Tool - Cordless, Rechargeable, Variable Speed

Although it is for pet care, this rotary tool is perfect for soft resin found in garage kit models and it even has variable speed. All for under $9!


Product Page : SE - Rotary Tool - Cordless, Rechargeable, Variable Speed